Goal
Some people have asked me how this blog was running after I explained them I turned away from Wordpress in order to get something lighter, more secure and, above all, more practical for the developer that I still am.
My needs were the following: - I should be able to redact an article offline, using a standard text editor; - I would prefer to be able to do so using Markdown, as I am quite used to this syntax; - I am really bad at UI, HTML, CSS and the likes, so the solution should provide a nice style without me having anything to do about it; - Everything should be stored in a git project, as I am fed up with needing to backup an entire database to keep my content safe; - All technical phases should be automated: I just want to redact and push, nothing else.
Technologies used
Pelican
Pelican takes care of transforming Markdown into a nice HTML blog. It is a tool based on Python, so I know it will be easy for me to debug something if there is a problem that is not handled by the community in the next version.
Github Actions
The content will be sent to a Github private repository, and a continuous integration and deployment pipeline will be activated to generate and deploy the blog website everytime I send a new article.
Hosting
My gouigoux.com domain is handled by OVH and I have an FTP access to the www directory. Github has a secrets management function included in the Actions feature, so I will not need to expose my access. A subdomain called blog.gouigoux.com will have to be created.
Setup
Github
After creating a private repository called blog-md, I go to the Actions menu and create a workflow that I call Pelican. The content of the actions.yml file is the following:
name: 'Pelican'
on: [push]
jobs:
  build-and-deploy:
    runs-on: ubuntu-latest
    steps:
      - name: Retrieve source
        uses: actions/checkout@v3
      - name: Install Python
        uses: actions/setup-python@v4
        with:
          python-version: '3.10'
      - name: Install Dependencies
        run: pip install pelican[markdown]
        shell: bash
      - name: Build Pelican
        run: pelican ./content/
        shell: bash
      - name: Install LFTP
        run: sudo apt install lftp
        shell: bash
      - name: Load Secrets
        run: echo "machine ${{ secrets.FTPHOSTNAME }} login ${{ secrets.FTPUSERNAME }} password ${{ secrets.FTPPASSWORD }}" > ~/.netrc
      - name: Deploy Output
        run: lftp -e "mirror --parallel=100 -R ./output/ /www/blog-md/" ${{ secrets.FTPHOSTNAME }}
        shell: bash
The content should be self-explanatory for most of the file lines. The pelican command targets the content directory in my repository, where I put the content of the blog (including images in a subdirectory), in order to keep all of it separate to the technology that turns it into a blog, in case I need to change this someday.
In the settings menu of the repository, I include the value of the secrets for my FTP deployment server, and use lftp to send all the files by mirroring the "local" output directory created by the pelican command with the remote /www/blog-md/ directory I created on my OVH FTP content.
Pelican configuration
I create two files in the root directory of my repository, in order to provide Pelican with some guidance on how to generate the content (pelicanconf.py) and how to manage the deployment of it (publishconf.py). The content of the first file is the following:
AUTHOR = 'JP Gouigoux'
SITENAME = 'Blog JP Gouigoux'
SITEURL = 'https://blog.gouigoux.com'

PATH = 'content'

TIMEZONE = 'Europe/Paris'

DEFAULT_LANG = 'fr'

# Feed generation is usually not desired when developing
FEED_ALL_ATOM = None
CATEGORY_FEED_ATOM = None
TRANSLATION_FEED_ATOM = None
AUTHOR_FEED_ATOM = None
AUTHOR_FEED_RSS = None

# Blogroll
LINKS = (('Pelican', 'https://getpelican.com/'),
         ('Python.org', 'https://www.python.org/'),
         ('Jinja2', 'https://palletsprojects.com/p/jinja/'),
         ('You can modify those links in your config file', '#'),)

# Social widget
SOCIAL = (('You can add links in your config file', '#'),
          ('Another social link', '#'),)

DEFAULT_PAGINATION = 5

# Uncomment following line if you want document-relative URLs when developing
#RELATIVE_URLS = True
Again, there is not much to explain here, particularly since I have mainly kept all defaults options and not even removed the links yet. Same goes for the second file, which is only used when you publish locally:
import os
import sys
sys.path.append(os.curdir)
from pelicanconf import *

# If your site is available via HTTPS, make sure SITEURL begins with https://
SITEURL = 'https://blog.gouigoux.com'
RELATIVE_URLS = False

FEED_ALL_ATOM = 'feeds/all.atom.xml'
CATEGORY_FEED_ATOM = 'feeds/{slug}.atom.xml'

DELETE_OUTPUT_DIRECTORY = True
By the way, if you start Pelican locally and use its integrated functions to generate the basic boilerplate, you will also get Makefile, requirements.txt and tasks.py files, which will help you run the blog site before you commit anything.
OVH configuration
After wasting quite some time trying to figure out how to manage the redirection, I finally realized the right way to manage my subdomain exposition was to use the "Multisite" interface (https://www.ovh.com/manager/#/web/hosting/gouigoux.com/multisite).
Then, it was extremely easy to simply associate the subdomain blog from gouigoux.com to a redirection to https://gouigoux.com/blog-md/ and wait a bit for the association to work. The SSL certificate had to be renewed, but the interface made it quite easy and, again, it was only a question of waiting for a few minutes.
Use
Now everything is set in place, I only have to concentrate on the content of the blog, using tools that I am comfortable with.
VSCode as Markdown editor
I open my VSCode and concentrate only on the content directory, which contains text plus images and nothing else. The Markdown All In One plugin helps by providing the following commands:

This way, I get a nice preview of what will be displayed. Simply pasting images in the text content generates an entry like the following:
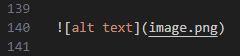
I then simply rename the images, displace them one level down in the images directory and adjust the Markdown link, checking they are still displayed on the preview panel. After that comes the only remaining thing that hangs on the technical side, which is to prefix the image URL with {filename}, the best way I have found, for now, to avoid problems with accessing the images in relative/absolute paths (if someone knows a better way, I am eager to know about it; please email to jp at this domain):

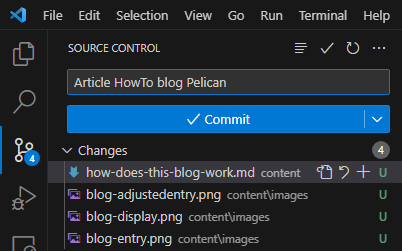
Sending the content
The rest is as easy a commiting, then pushing:
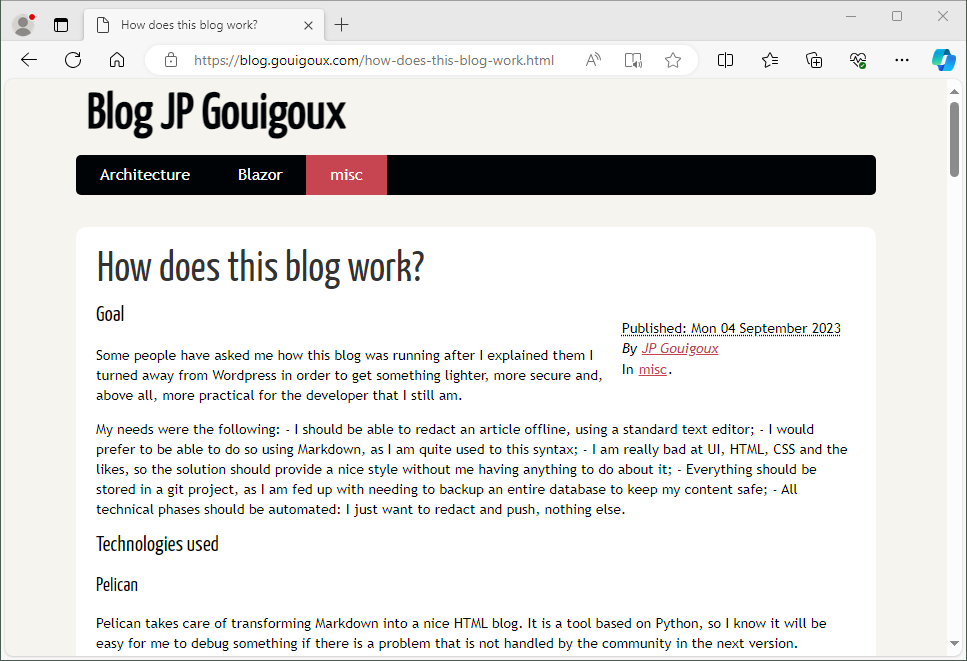
And a few moments later, the article is online!